Light volumes…
In my test arena, I had some performance issues in same places, where about 9 lights were shinning in a greater or smaller degree…
Considering that in a deferred renderer, the main issue is bandwidth (each shaded pixel needs at least 64 bytes of data to come in from texture memory – the G-Buffer), I thought that the best way to lessen this impact was to render the light volumes, instead of just drawing a rectangle that approximated the light.
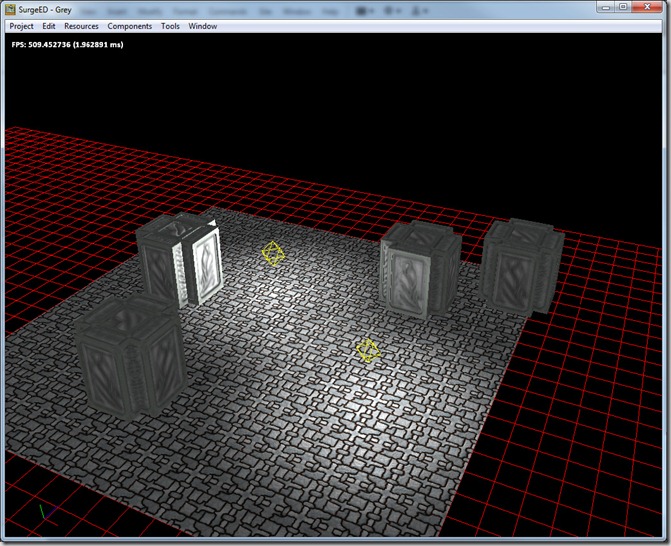
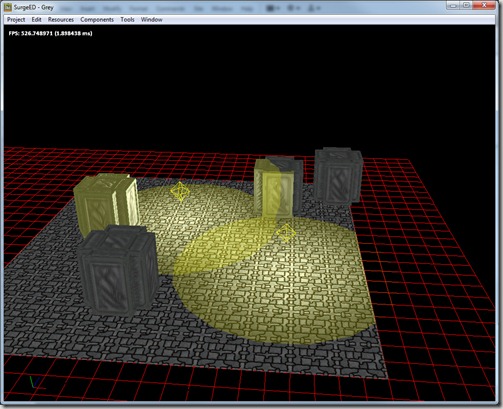
Starting off, this is my test scene:
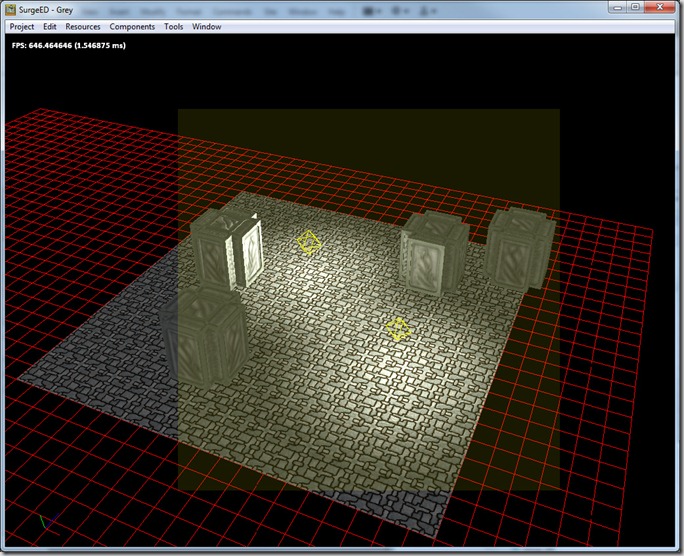
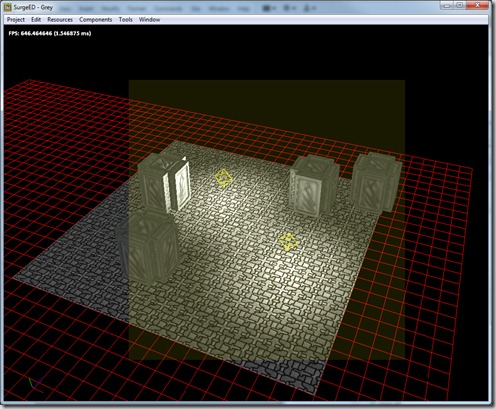
So, at that time I was approximating the lights with rectangles, which led to a lot of wasted fill-rate, since the rectangle touches places in the image where the lights aren’t felt at all…
Note that these rectangles describe where the lighting shader has to touch the scene… In this case, it had to touch parts where there wasn’t even geometry to be lighted, and the corners are never touched at all (since they’re always outside the light’s area of influence). This is even more serious in directional and spot lights…
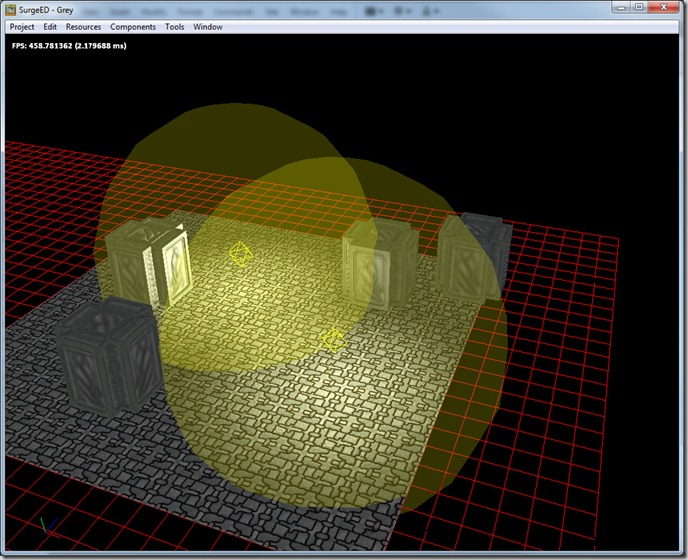
Anyway, first I just built some light volume geometry (spheres for point lights, half sphere for hemisphere, cone for spotlight and box for directional). Rendering the result for the example above:
These volumes touch much less area, but since these volumes are rendered in world space (instead of the rectangles which were rendered in screen space), we can use the Z-Buffer to do some culling…
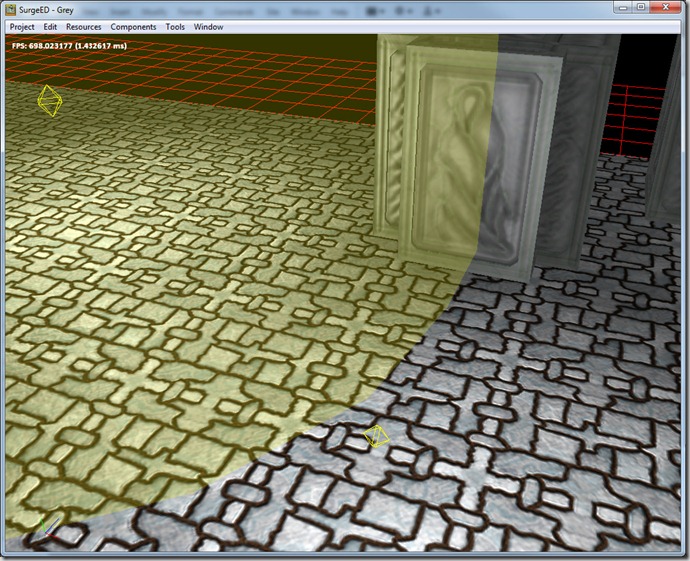
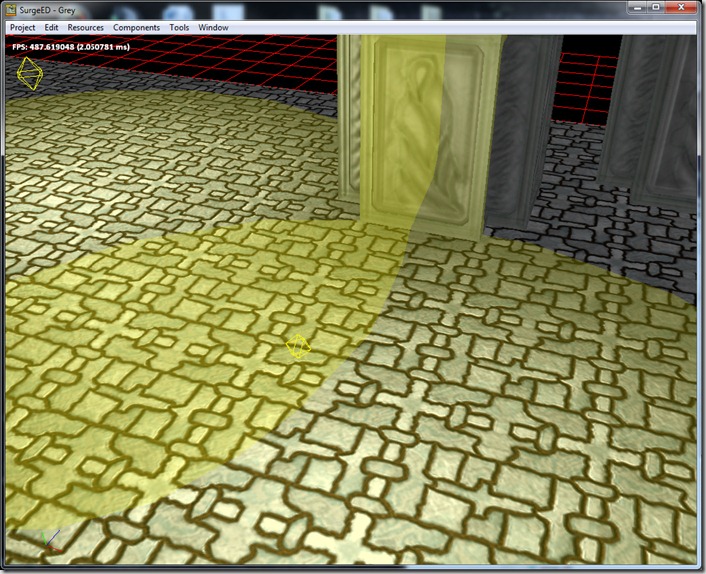
The first problem this has is the fact that we’re drawing only the front face of the spheres, which means that when we go inside the light, we cease to have lighting (because the back-faces aren’t drawn):
My first step was to make the shader (or more precisely, the shader decision system) aware of the position of the camera and the light… So, when the camera is inside the light volume, the system switches to a different shader that renders the back faces instead of the front faces.
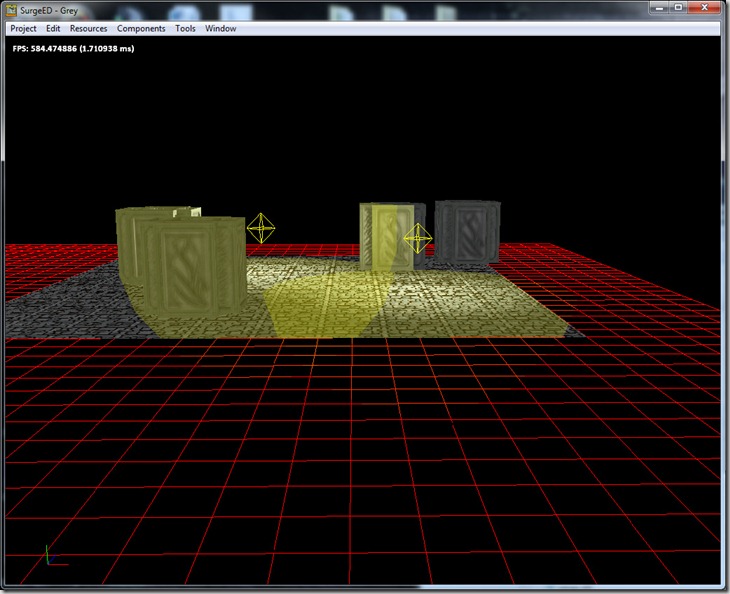
Why use culling at all? Because if we don’t use it, some places might get doubly shaded (resulting in twice the lighting computations). In the example above, I’ve added the first real optimization, which is drawing the back faces with Z-Greater function… That means that only the pixels that are closer to the camera than the existing geometry will actually be rendered, i.e., only those will be shaded, which is the correct result: in practice this will only light up things that are actually inside the light volume! If you look at the top right corner, that object there shouldn’t be lit by the closer light, since it’s outside the radius of the light… If we didn’t do the Z-Greater function trick, it would be lit by the light (the contribution of the light to that point would be zero, but all calculations would be run anyway, which is a waste)!
Using the same trick outside the light volume (drawing the back faces with the Z-Greater function), we get:
So, we still don’t light that object on the top right, which is great!
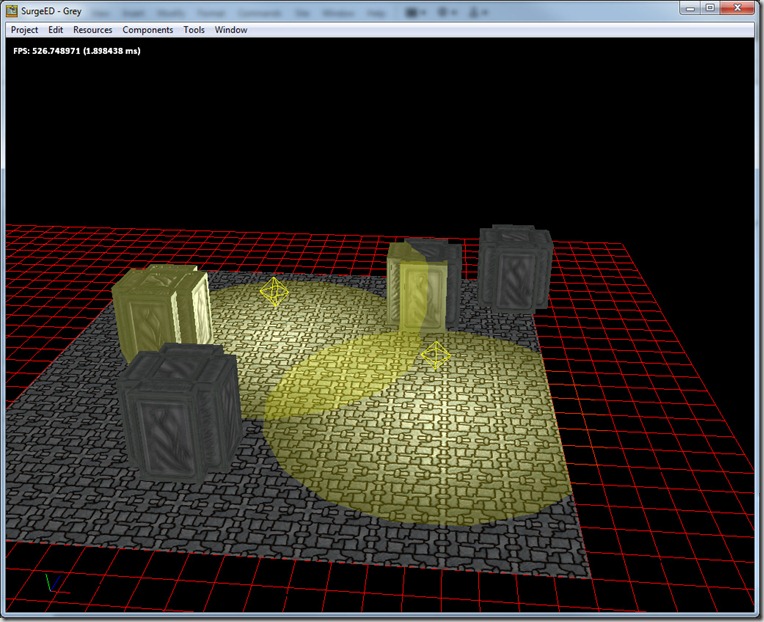
But this got me wondering… couldn’t I do the same in the other direction? Note that the crypt closer to us gets lighted by the light on the left-side, even though the light shouldn’t reach it (besides being back-facing, it’s outside the light radius).
So, I devised a small multi-pass algorithm that allows me to cull objects that are outside the light volume completely, even in the case when the camera is outside the light volume.
As I said, it’s multi-pass (so we have to render the light volume twice):
- First pass
- Disable color writes
- Enable stencil write
- Set Z function to Z-Greater
- Draw back-faces of light volume, setting the stencil buffer to a specific value (1) to every point that passes the Z-Test
- Second pass
- Enable color writes
- Enable stencil writer
- Enable stencil test (compare equal to 1)
- Set Z function to Z-Less
- Draw front-faces of light volume, setting the stencil buffer to a specific value (0) to every point that passes the Stencil Test, using the light shader
Basically, the first pass sets the stencil buffer to 1 in all pixels that are inside the light volume extruded up until the camera (in the case of the sphere volume, imagine that it gets extruded into a capsule up to the camera).
The second pass only considers those points, and clamps it with the normal Z-Buffer rules. In practice, this will only allow the render to affect the parts that are actually influenced by the light!
Note that the crypt on the lower left doesn’t receive any influence from the light on the left, like it did on the screenshot before that one…
If you compare the yellow area on the initial screenshot and the latest one:
It’s evident that this new algorithm really cuts down on the fill-rate, in exchange of some more vertex operations, which aren’t that expensive…
Note that the “camera inside light” operation is done per light, so each light can have different shaders applied.
All in all, in my test arena, the place with 9 lights was running from 40 to 80 FPS (fully shadow-mapped with PCF), and with this improvement, it now runs between 200 to 400 FPS… I call that a win…
Spellbook’s deferred renderer still has lots of improvements possible, in terms of optimization and improvements (HDR, for example), but I’ll leave it alone until I hit another bump in terms of performance…
I still have some weird performance issues, in which the framerate will drop from 400 to 70 FPS, and then slowly rise again until 400, dropping again to 70, and so forth… This happens even if I don’t move camera, lights, etc… No idea on the reason why, but I’ll probably find out during development… ![]()
Comment
You must be logged in to post a comment.